

Catch up on the first 3 days of progress Day 1, Day 2, and Day 3!
We left off with sort of a haphazard drafting of the chest plate armor. We will come back to that in a minute. The under shirt arrived and if I have time that will need to be aged and hopefully be convincing! Pants and wrist cuff were ordered Friday and managed to arrive Saturday before 8 so I was really happy about that. I had to suffer with my desert tan boots- but whatever- I’m not obsessed with being perfect for this- but close enough was adequate. There’s always a next time. I knew the pants weren’t going to be right either- but I didn’t want to buy more expensive mock up pants (they have knee armor and front facing cargo pockets- and 90% of cargo pants do NOT have front facing cargo pockets- but side ones. If I had time I would have moved the pockets- but again- priorities.
Back to the vest: I needed to create shoulder straps and finish the armor. The big question and ‘try it and see’ aspect of this would be use the existing harness to make shoulder straps or use it as the under bust straps? Because his vest has significant straps and back panel at the waist, for me this will be in the under bust, and needs to be there, at least as a nod. Then I need the lacing and to drag it through a lot of mud and hope for the best.
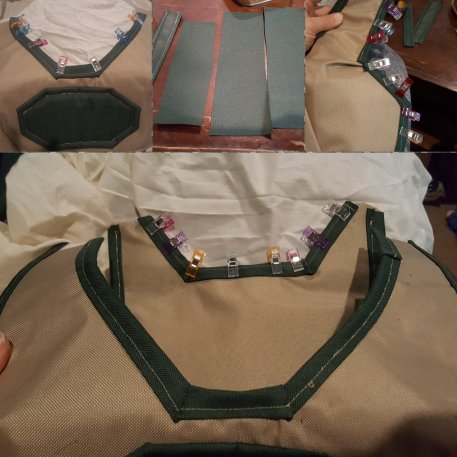
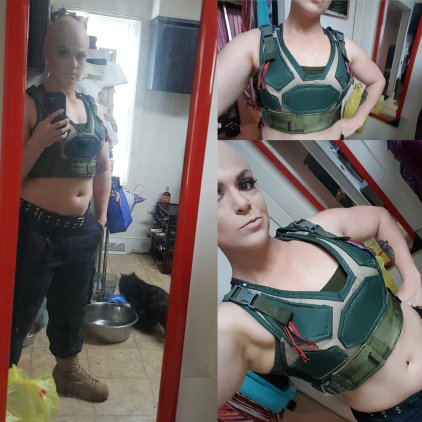
I wanted to finish edging my vest- so I cut out the pieces- ran them through the machine and used my binder clips to secure them in place. I did this on both the front and back panels- I think it created a nicer finished look and just pulled the whole thing together and would visually keep the vest from disappearing into my skin.
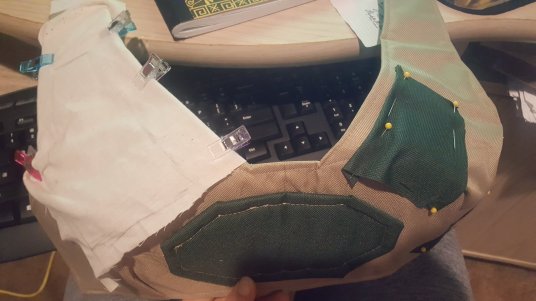
If you remember from day 3- we were here with this panel situation. I wasn’t crazy about the shapes I had created on the right by winging it- so I pinned the muslin to the left side as shown below and just sketched the shape I thought would work best on there- I did this for the bottom wing piece as well.
I then trimmed out the shapes and played with the edges by trimming them up and moving them around till I got something that made me happy. I think took that shape- and cut it out directly with no easement on it on the dark green fabric. I then took that piece and cut out the batting to be sewn into the armor plating.
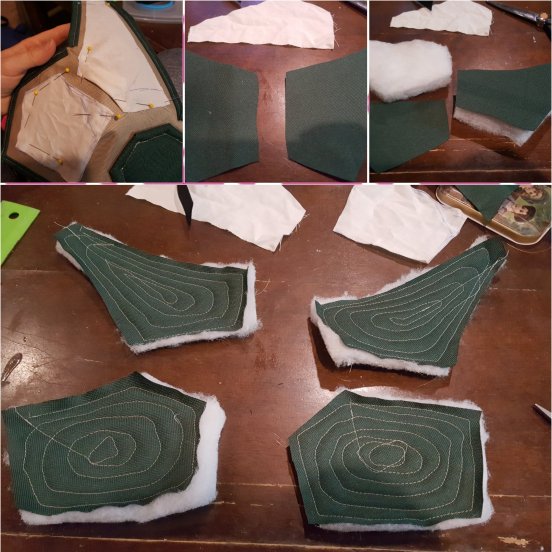
I then stitched around the outside- and then circled in on the batting to compress it down. they feel fairly comfortable but compact. I’m glad I figured this out and stumbled on this plan. it’s the most consistent and produces the best results of the options I tried.
Once they were all stitched down- I cut out a wide easement piece of fabric and stitched them down turned the edges and then stitched them down again to try to keep the line of stitching consistent. Shitthead is giving my his opinion. As cats are want to do.**
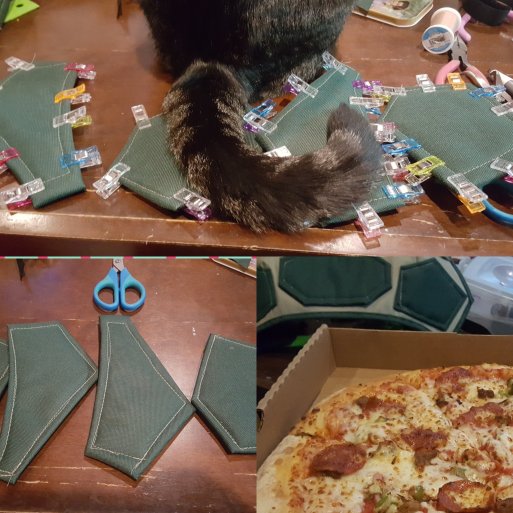
I actually wound up picking out the stitching on these and trimming them down because they took up too much space on the vest- so I trimmed them down and stitched them up again- but #details – you didn’t need to see all that again. Then of course #fatkid- I ordered pizza- which I’m sure is hell on the diet it- but costumers gotta eat too yo.
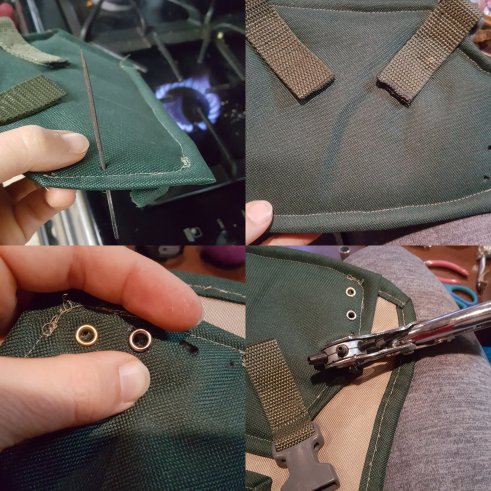
NEXT ON THE AGENDA- putting eyelets on the back panel. You have to prepunch material generally before installing them- so I took a metal filing dowel and heated it up on the stove- I don’t have an awl so I had to make do. Then I use my leather punch to clear the space out a little better and applied at least 4 eyelets wrong before remembering how it should be done. In hindsight I wish I had done the back panel as I had done the front (later) which was by punching into webbing and using that for the lace up. It would have been less permanent and more adjustable. I also really regret not going out and getting real grommets- they are more difficult to install than a simple punch- but they are far more reliable and durable. Plus a wider range of sizes I suspect. Grumble- this is one of those “I do it every single time and never learn my lesson moments” I fucking hate eyelets- but whatever- it’s done. I’ll fix it for the next time I have to use this.
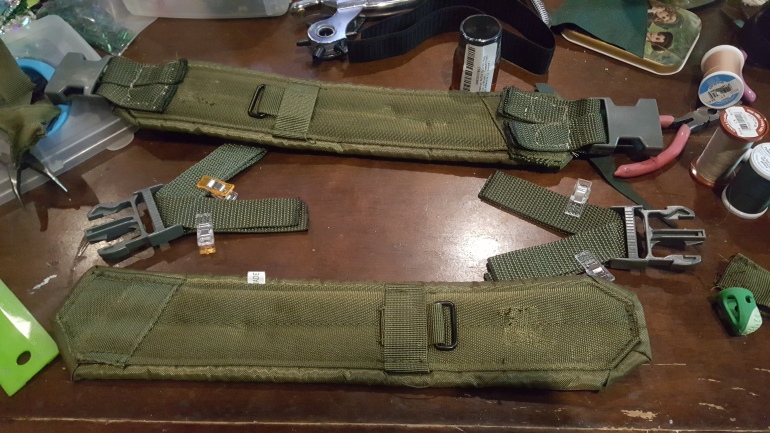
From there I worked on getting the straps organized for connecting shoulder to shoulder. I cut an rectangular shape with shaped ends from interfacing and covered in in the dark green fabric.
I took the webbing and cut four short little pieces to act as channels and tail end holder downers. (that’s a technical term). My documentation and picture taking really slowed down at this point becauuuuuuuuuuse it’s now around 12 or 1 AM and I am trying to just get things done.


Once this was complete I cut tabs for the buckles and attached buckles to meet up with the ends already attached to the back and the front. Once the straps were completed all that remained was the wide under vest section that I was harvesting from a premade harness. The harness I had was just an over the shoulder harness with webbing straps to clip to another belt. I wasn’t entirely sure what I wanted all that for but I knew I was going to need extra bits and the different color/texture would help add to the look.
I stripped the hanging clip straps of webbing off- and separated the shoulder pads into two pieces and cut tabs and added buckles. Don’t forget to melt the ends of your webbing with a lighter (or if you’re like me and couldn’t find it- your regular gas range)
Once this was done I made webbing tabs for the eyelets for the front panel with the same burned/punch technique as the back panel (but directly on webbing not the actual vest).
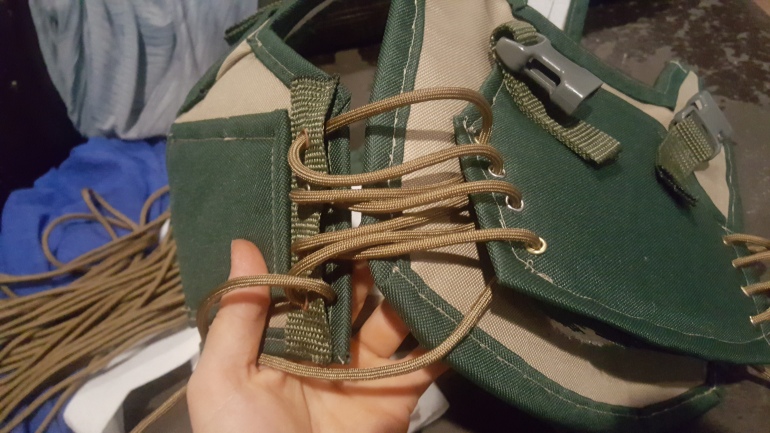
Last step at 2 AM was to try to work out the lacing situation- unfortunately my eyelets are small- and because of the nature of the eyelets not being as stable as grommets- I had a hard time getting the para-cord through the eyelets without shoving the outer nylon casing back and just the inner white cords coming through AND all the while trying NOT to rip out my flimsy eyelets. It was easily the most exasperating part of the project thus far.
BONUS FRUSTRATION! And when I went to slip it on over head- I realized that A. I had cut my cording way to damn short (and it was pretty long) and B. that as suspect I should have had a panel in the middle to create a floating piece in the middle that laced the front to the back. Lacing just front to back created a fairly large gap that I wasn’t crazy about.- upside- it showed off way more lacing- so win/lose situation there.
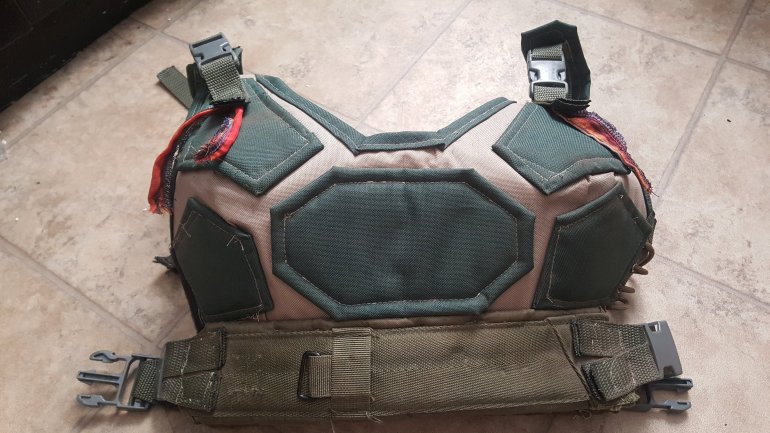
All of that rambling to say- it did not fit over head- and certainly wouldn’t fit with all the bald cap and mask situation going on for me. So I made the executive decision to pull one of the webbing straps off and attached velcro. The bottom heavy duty padded bands made great support from underneath- and really helped my already fitted vest stay up nice and snug.
I realized last minute I didn’t have any pull tabs on the front- he has red ones- but I had ZERO red ribbon (seriously? I have piles of everything) but I DID have this pink/red/orange scrap fabric. So finishing touch was adding some chiffon orangie pulls to the front buckle webbing of the vest to give the whole kitten kaboodle a pop of color- and also be more accurate. I think they really polished off the look of the vest and I was really glad I took the 5 minutes to get that done the morning of the performance. With those adjustments made in the final minutes up I put it in the hands of the performance gods and packed it up and went on my way.

All together with the vest/undershirt, boots and pants I think it was a really nice nod to the character and is functional as a performance piece. My friend picked me up and I had literally just finished sewing those little orange things down and throwing everything in the bag- and realized I never had a chance to go rub the whole thing in the dirt. So during intermission I went out side and found the one 2 x 1 foot patch of actual dry dirt and just went to town scrubbing it away. I added some to myself- because well- people who live in dystopian worlds aren’t clean- so neither would I. I came back in and we all went “oh yeah that’s much better” it’s the little things. 😀
It felt really good and solid in terms of presenting a performance piece based on the character.
I think what I loved most about the vest is the fact the whole thing was so solid I could actually hang off it like he does throughout the movie- that made me rather happy for some reason.
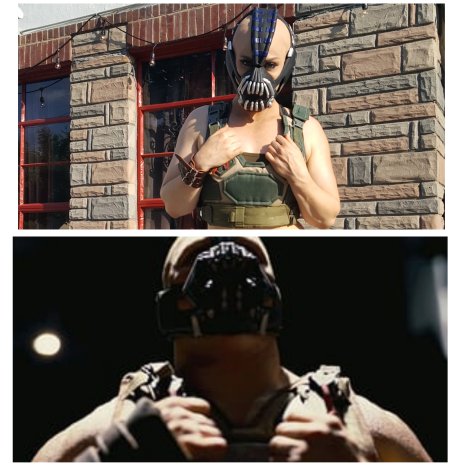
All in all- there are details I would love to improve upon- obviously I don’t know exactly how his gear was rigged up- so I sort of just guessed on what I saw- and I got really focused on a few details causing me in my rush to miss others (his has full straps all the way to the front- and also some center buckle that mine definitely doesn’t) and now these details bother me as I sit and and look at what I created but the reality is- a lot of energy and time went into trying to create something of a replicate (which in all reality wasn’t happening without months of time) for a performance likely not to be repeated regularly. I don’t really cosplay and I don’t usually do really specific characters like this so over all quiet pleased. I learned a little bit about how I’d continue to make costume pieces and a really awesome thing for me was the fact I drafted this from muslin- which is NOT something I do so- yeah- big win of personal sewing success right here! All in all it was impressive in person and on stage and really carried through the performance. I also did my first bald cap- stay tuned for that blog post! So a lot of lessons learned and a really great thing I have to pull out for Halloween/cosplay or other fancy shows!
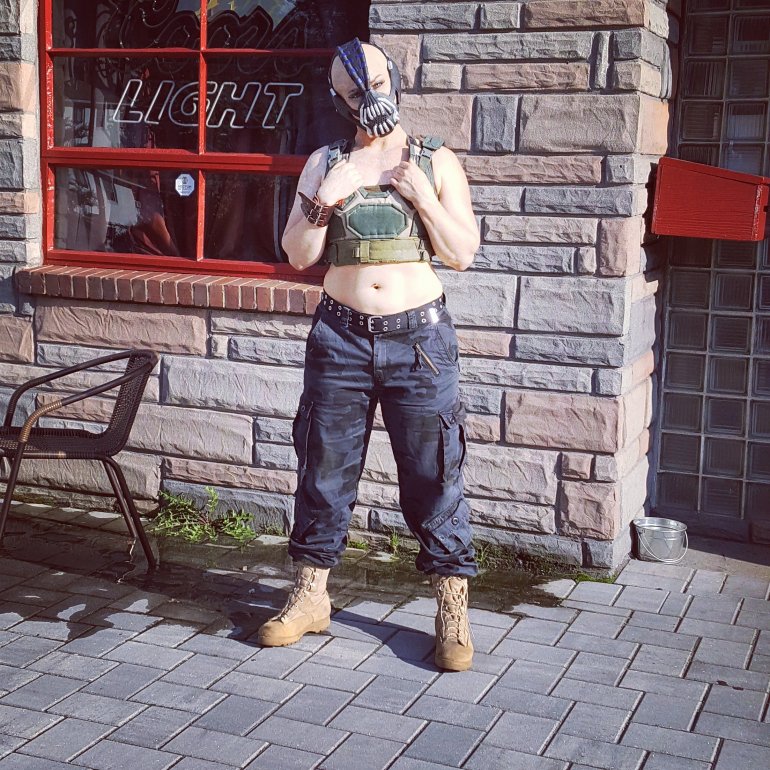
And here’s the final look all pulled together the day of the event! Thank you Donna for humoring me to take some extra shots out side. 😀
And that’s a wrap! I hope you all had an amazing weekend- and we’ll be back later for more posts on the event and my adventures with liquid latex!

THIS IS SO AWESOME!!!!! You did an amazing job! 😀
LikeLiked by 1 person
Thank you so much- I think for my first character costume in a long while- it came out pretty solid! 😀
LikeLike