
Welcome back fearless costumers! Ready to dive into the creative process?
I’ve started in designing the belt- which usually have no idea about what I want to do till I get there- which sometimes- causes grief- but you just sort of- go with it.
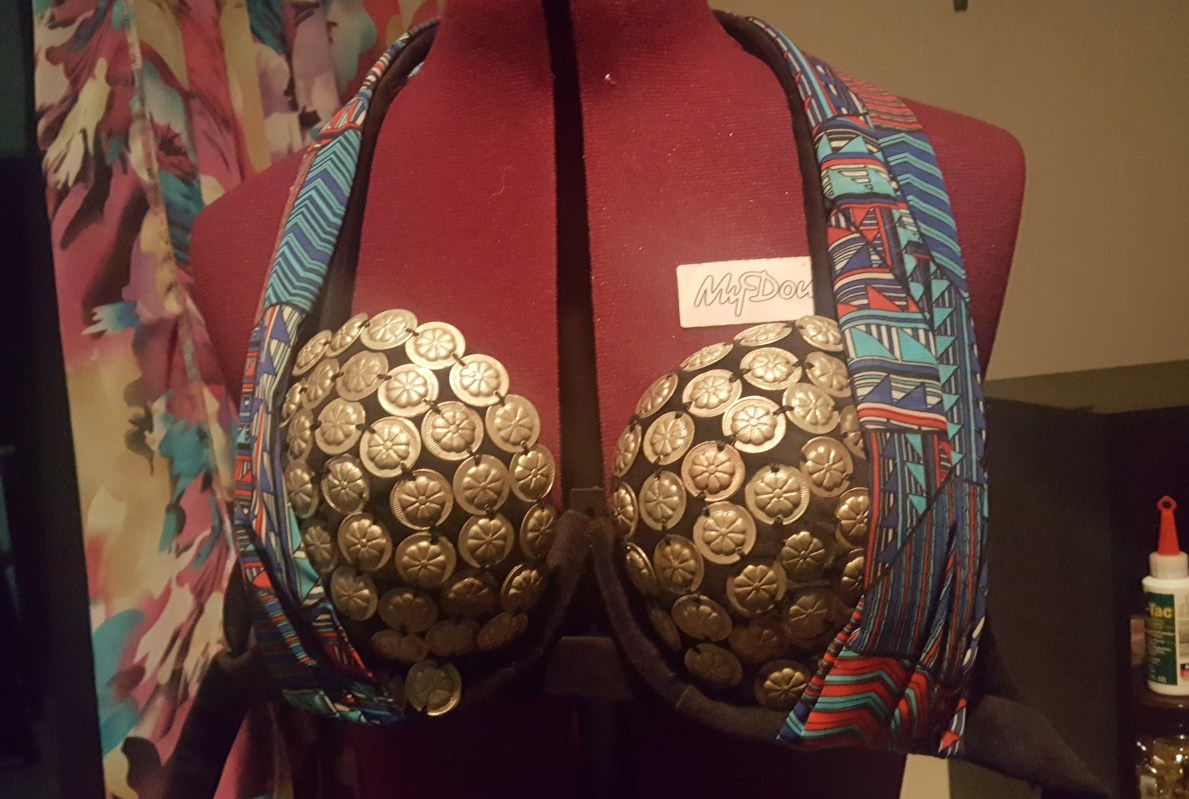
So last you left- we were here:

I have more of the flat medallion things found here on The Red Camel . And obviously more fabric- I have some more bits and jangley bits I’d like to see added- but for now- I like the stoic simplicity of what’s going on up top. So- I want to create something strong and simple in it’s design on the belt.
I also have to keep in mind- I have a circle skirt that matches the brightly colored fabric- so I can’t have it just across the bottom running into the skirt fully- there has to be SOME sort of delineation.
Let me let you in on my secret… truly the real nuts and bolts of this is… But don’t tell anyone okay? Promise? Okay here we go-
I mostly just start throwing shit on there and seeing what sticks- and what looks good- what makes me go “eh” vs OH YES. The ration of “EH” to “YAS BITCH” is probably like 8:1 on average- sometimes it’s less- sometimes it’s so bad you have to put it down for several months- but usually I’d say more than 5 and less than 10 ideas will get you in the ballpark. But if it’s 20? so be it- design is art and art is design. Sometimes you have to find your inner zen.
This was the first of two ideas (right and left are different ideas)- I wasn’t crazy about either honestly.

Then I tried this. *shudder* with a “bias tape” look across the top. #nofkingthankyou

And I found myself (And the cat) pretty happy with this shape and situation- I’m going to be jujing the top part a lot more- but overall- I like it. Getting the rough shape of the accent fabric was really the priority. This isn’t earth shattering- its kind of boring on it’s own honestly- but I think it will look sharp and simple all put together.

Also- there are almost 45 medallions laid out here. I ordered 50 more, to finish covering the bra- and for the belt. And I realized my initial idea wasn’t going to work- and I needed WAY more medallions- so lucky me- I ordered 2 more- because 50 won’t cover the back if it barely covers the front. Not that this should surprise me- I always do this- I must pay a fortune in shipping- how USPS can be going out of business at the rate I order things is beyond me.
Regardless- try to take stock in what you have- what you think you need- and order ahead of time so you don’t lose too much steam. Mine will come in mid next week- and I’ll have them by the time I get the front locked in- so I won’t lose to much time!
Now that I’ve got my design worked out (mostly). I suspect some tweaks to happen- I start taking these puppies down. Fortunately or unfortunately I forget how long this takes- and here I am- still sewing. Slow and steady. The assiut post from Sunday took a little more time than I had wanted, so Saturday productivity was a little low.
I’m hoping to get this costume done by April 22nd for this Live Band Performance at our studio. Which, obviously, I am extremely excited about, if you’re in the neighborhood you should DEFINITELY come. So chop chop- keep sewing!
I also ordered this necklace- hoping it would be the appropriate fit for what I was expecting to wear. Kind of excited about all the little things coming together!

But- I’m going to go back to watching Santa Clarita Diet (it’s horrifically bad- I know) and bang out the rest of the front of this belt!
So medallions! All the medallions
And when you’re done you wind up with something like this


Bonus if it doubles as a WWE belt.
Then the process of adding the top fabric, pinned in place from underneath then tacked down.


When it’s all tacked down I flip the fabric back up and over :

I wanted a rouche in the center instead of pleats so I did a base stitch up the middle. Then I’ll pull it snug and get even little ripples.

I will repeat the basting stitch on three points the center and equidistant to the sides. Which is difficult to see unfortunately- BUT the front is officially complete- and I have created the Cheshire cat costume!!! I thought I had updated this and posted- but it seems- I had not- so here we gooooooooooooooo! I’m going to repeat on the back and move forward! WE CAN DO IT! Till next time fearless costumers!

