

Thursday’s blog post is coming to you a little later today!
I have a few things on my plate at this point including more pants, more skirts and a new other project (remember- surprise costume!) and that doesn’t include this costume, and with all that-sleep somewhere in there. But there will be more on that later- let’s jump into this while we are here.
I had done some gathering of information to share with you all on the original post- and totally forgot too- SOOOOOOOOOOOOOO I’ll throw those in here now- some other peoples construction and a few other blogs that share some amazing tutorials.
I’ve learned a lot from the internet and all my savvy sewer friends and want to share some of them here!


Shout out to Razilee who shared so many photos with me of her process- which looks very similar to mine! The two sets of photos at the top were donated from a Facebook group, Lorelei creates hers in bulk (god bless girl!)
Sparkly Belly by Mao has a LOT of information- she has a few free tutorials as well as some subscription for other techniques or courses. She has a four part tutorial for bras that I’d recommend checking out- but she has TONS of content so don’t over look it!
They are well laid out and thorough- if you’re a total beginner or a seasoned costumer- you are likely to get something out of them. I’ve been doing my own for years and I still really enjoyed them!
Shushanna is a local (to me) Philly dancer- who has one of the most technical tutorials laid out- she’s a super nerd in the engineering world so hers are VERY detailed oriented and thorough- again- learned a lot and they are still one of the most commonly referenced tutorials on the webs for circle skirts! Check them out here!
Dawn Davina an her blog compiled a WONDERFUL list of bra constructions which is an awesome list to go through (and includes an entry from yours truly!)
Bhuz.com (RIP) is no more- but thank you all who used to help out there- because I learned SO.MUCH.
Having said that- let’s jump into wrapping up this one!
Once the base is completed and it FITS- you have your straps covered and ready to go- it’s time to cover it. This takes time- patience- quilt binder clips and pins. First things first- I cut a general square shape that’s 3-4” larger than the entire shape of the cup- again a flat but flexible surface covering something that is most certainly 3 dimensional and its’ going to take up extra fabric
I start at the top inside usually and pin my way around both sides.

I didn’t care for the way this fabric looked just with one dart- so I opted for some texture and a few gathers to give it some visual interest. This could have been also done on the belt- but I didn’t because I didn’t start that way- and I didn’t like it gathered on the belt- and originally my intent was a smooth surface. But being flexible and open to change is part of dance and costuming so there you. #lifelessonsbyjo.
See the three variations below- gathers, a regular pleat- several small gathers (which is what I settled on at the bottom)
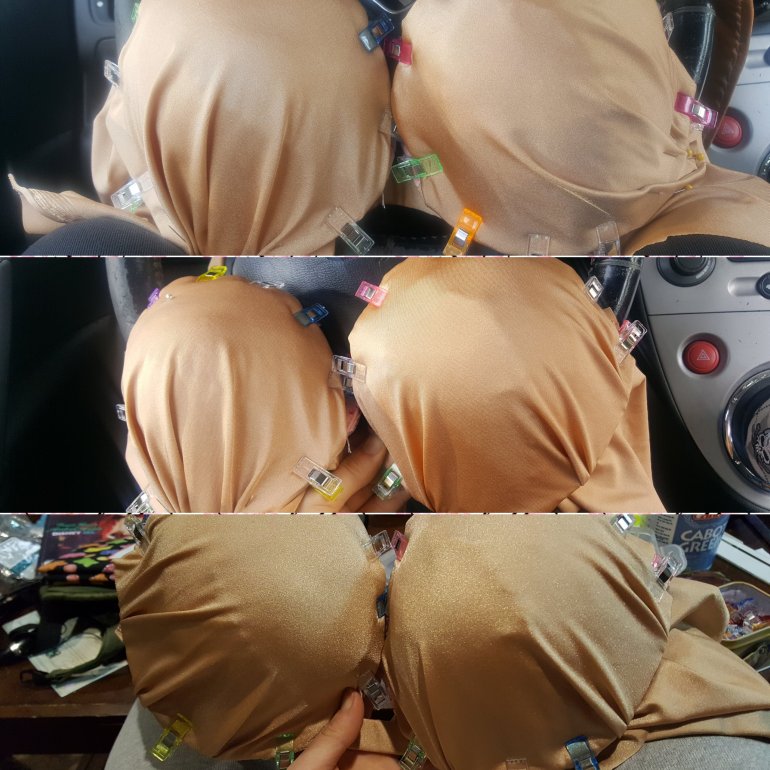
And once you settle on that- you start stitching the insides down
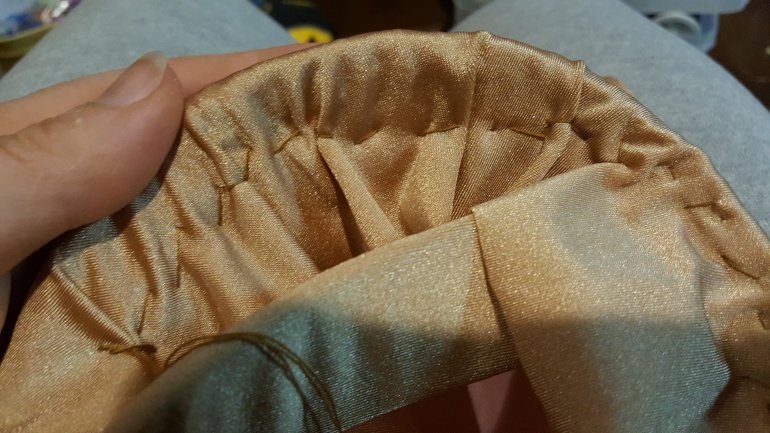
And that leads us to the biggest part of this – which is the inverted V in the middle. Which I took a rectangular piece and secured with binder clips and folded by hand to make sure it was a good fit. Then carefully sewed so all the stitches and seams were hidden.

I carefully stitch it together on the back to snug it around the front and it doesn’t have to be perfect- beeeeeeeeeeecause there are jewels to cover it!

Trim the inside and you’ll have something that looks like the right. ugly ugly ugly on the inside- but nice and tidy on the out!


Unfortunately it’s late and I’m behind today with an early start tomorrow- so I’ll share with you the finished product this weekend and share the new bra and the next steps!
Till next time fearless costumers!
