
DOING THINGS! ALL THE THINGS!
Today I want to share with you all my belt covering process! In full disclosure-I almost exclusively make the bra first then the belt. Currently, the bra is completely done outside of dangley bits and hooks/eyes. SOOOOOOOOOOO I’m just jumping right in with the belt and figured I’ll share the project I’m currently in the middle of instead of waiting till I start a new one at the very beginning. Today’s post is simply how I do my bases and then the next post will show the design process.
This particular belt will be going with my “bewb armor” costume- dubbed so because the bra looks like- well like armor for my bewbs. So Bewb Armor costume it is.
I also believe the belt will not look much like “crotch armor” so we are sticking with Bewb Armor for a costume name. Yes- almost all my costumes have names.
FYI- I am *not* going to be going through the making of a belt template (today)- mine are already done and making a new one can be a time consuming process. And I’ll be honest- I’m impatient and I hate doing it. So shelve that for another day- use a belt you already have and love- use that- trace it to paper- fit to you- and boom. There you go- least for now.
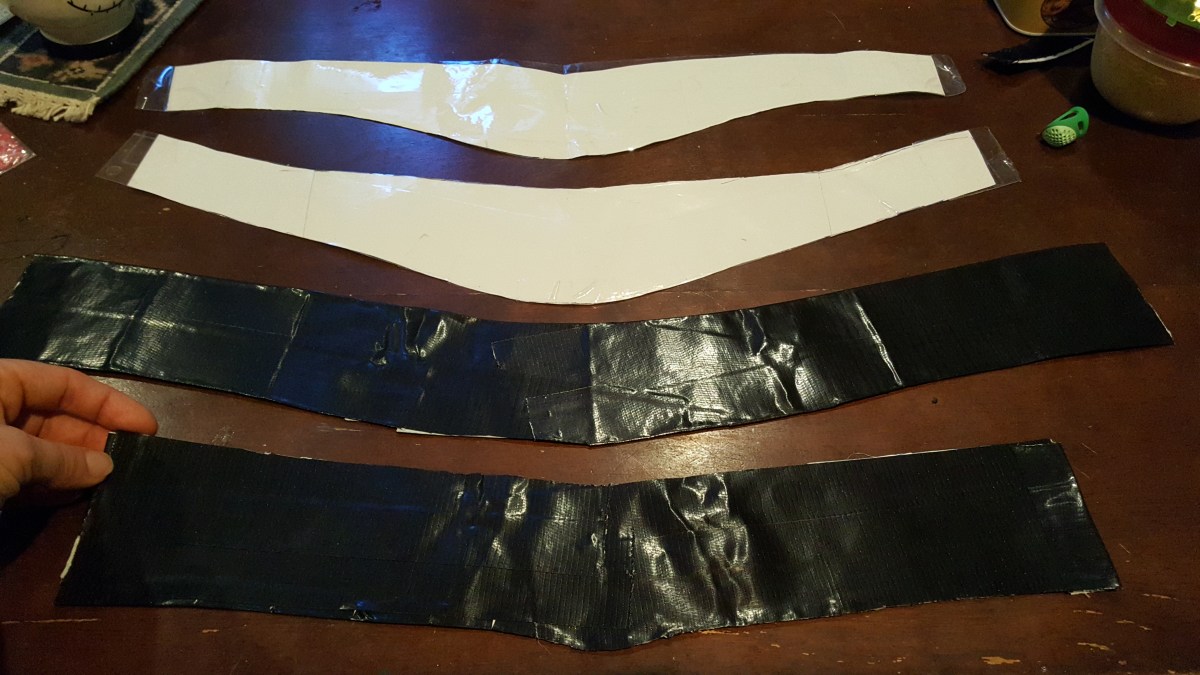
Shown here are two sets of belt forms- they are “diy laminated” with tape- I do not recommend the black duct tape- that was done in haste and I am not a fan.

Today I’ll be using the top form, it’s one of my favorite shapes, it’s very vintage, fits curves well and also less surface area to cover. So that’s what we like to call a
“win-win…win”
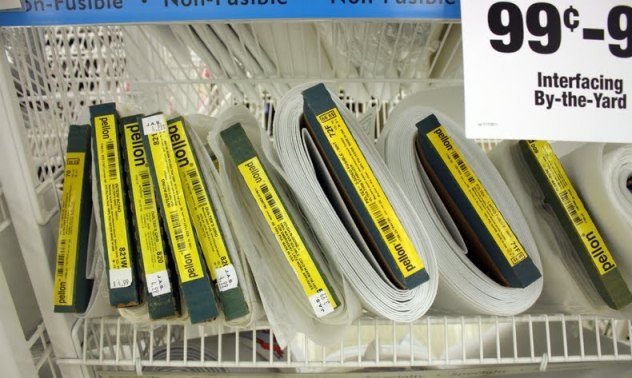
For all my belt bases I use something called interfacing- specifically Pellon 70 or 71F (fusible). You can find it here on Amazon or I get mine at Joann’s- its *usually* behind the cutting counter and will come on a storage rack that looks suspiciously like this. I use either/both- which ever they have available but I prefer 71F.
But JO WHAT THE FUCK DOES THAT MEAN? Excellent question!!
F= Fusible = heat activated glue shit and you can iron your fabric on it and it will bond. Not a strong bond but it will bond.
Generally I use fusible interfacing because it makes the job of covering the belt a little quicker and keeps the back more tidy, but it really depends on the fabric- some fabrics do NOT take any heat well and just melt, or just look bad when ironed down like that.
If I suspect the fabric might melt I test the fabric on a scrap piece of interfacing, don’t iron it or just skip using fusible interfacing at all. Also the fusible interfacing has a really scratchy shiny side that’s’ noticeably different than the other side- that’s the heat activated side.
If it’s a light fabric- make sure the fusible portion is to the back and just fold the edges over and carefully iron down the back- starting at the top. Fusing the front of the belt with a delicate fabric can really change the texture and look, possibly will ruining it entirely depending on what you had in mind. Sometimes I stitch the fabric down- and THEN iron the back- just so I know the front is exactly how I want it without running the risk of getting crinkles on the front- and it keeps all the fabric in the back organized a little better.
As a note-I personally do not reinforce the belts- the interfacing is pretty strong with the addition of fabrics so I don’t reinforce with grosgrain ribbon. If you think you might need it- it never hurts to run one piece across the very top edge before you cover just for piece of mind. Or if you picked up a softer interfacing or built it from something else that might pull apart- you can’t really go wrong with the ribbon back up. It works well under tension and it gives you good peace of mind.
So- interfacing- template- first step is just to cut it out. Here is the form at the top- and two sets of belt bases I’ve cut out- I do usually label them- here I can tell front from back- but sometimes as I move forward I get them confused and it’s useful once they are covered to keep track.

For this project I have a smooth fake swede type black material- and it’s tolerant of heat AND made a nice base for the medallions I have. Place the form on top of the fabric and then cut around- you can see I didn’t do a great job since it’s a little tight on one side- this fabric has no warp or weft so it won’t twist- but if you have a woven fabric- this would be a problem because getting it to fit would cause it twist.

This interfacing was fusible on both sides- so I ironed it FIRST on the front- THEN trimmed and ironed down on the back. You can see that in doing the front first- I accidentally shifted the form under the fabric and I don’t have enough wrap across the top on that top left and bottom right corners. This fabric isn’t woven and won’t fray- so I’m not TERRIBLY concerned- but in generally you want at least 1/2″ to overlap.

Also! NOTE- do NOT iron the back over the fusible interfacing without your fabric on it- you’ll get fusible crap all over your iron and be angry. That’s why I missed up the placement is because the form was UNDER the fabric and I was ironing the fabric TO the interfacing- not the interfacing to the fabric- I wouldn’t have been able to iron the back down like I did here because it would have been all over my iron. Does that make sense?
So- iron the front if you can- then turn the edges- and iron the back. If it’s only ONE sided fusible- I like to either, use quilt binder clips and secure it in place as I want and then carefully iron around. OR I secure it mostly- then iron the top edge down- flip it over make sure it’s all smooth- secure with some clips- and then turn the bottom edges with your little clips/pins and iron down as I mentioned above.
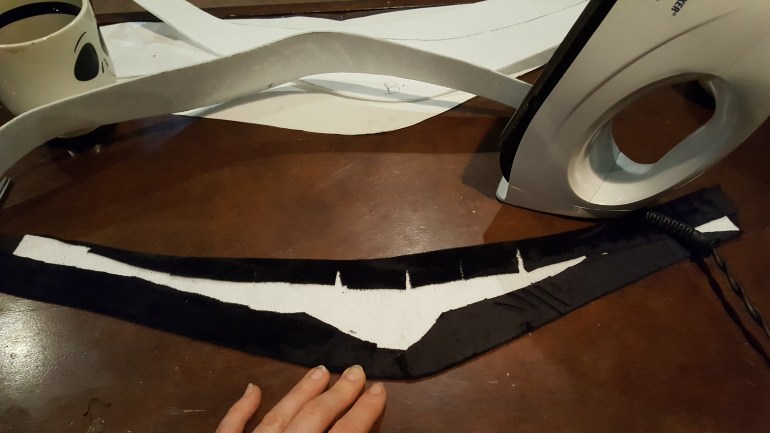
You can see in this above picture- I snipped the fabric across the top for the rounded edge- this releases the fabric so it doesn’t pull too tight. It’s also snipped on the bottom to over lap to reduce bulk- but that’s hard to see- the only one I think you can see is the very bottom one at the V.
Then – whip stitch the back and turn the corners to finish. I like to trim one side like shown below (the angled left side was trimmed- the right was a happy accident/barely covering the base)- This reduces the bulk under the ends where you’re going to be putting hooks/snaps and things. Just don’t take TOO much off- or it winds up like the right side- and well- you don’t have enough to cover you belt!

Then repeat for the other section.
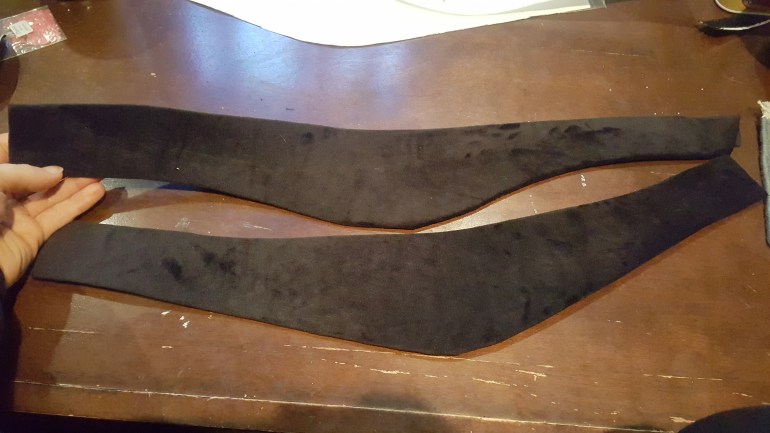
When you are done. You should have something that looks like this. You can see they don’t look EXACTLY symmetrical. I’m pointing it out because, well it happens.
My forms aren’t *exactly * symmetrical. But they are pretty close. And when you cover them with fabric. They are pretty close. And once you start decorating… You barely can tell. Put them on a body and whatever minor issues you think YOU see will never be noticed. This is one of those things where you have to use your judgement and as you get more experienced, you make better judgement calls. When you just start, sometimes you may say *fuckit* and by the time you finished it’s a hot unwearable mess. It happens. Don’t worry. No one died from a ruined costume. Chalk it up to valuable learning and move on.
The idea is to get it as good as possible without stopping the construction train in pursuit of perfection.
In this case, this doesn’t ruin anything. Front to back and decorated, it will look perfectly fine. So we kept it as is and get on to the good bits of design and decoration! I hope this was helpful- let me know if anyone has questions please just ask!
Happy cutting!
