
Welcome back fearless costumers!!! Are you ready to dive into a world of beads, fumes and glue! Unfortunately I’ve been home for two days with some sort of summer crud that I could’t afford to give to my work mates- so I stayed away but it means that I was able to settle in with some quality Netflix and bang out the rest of the fringe for this bra. Lose/Win?
As of Monday post we had finished one set of the bra fringe and I was fiddling with placement on the cup a wee bit. 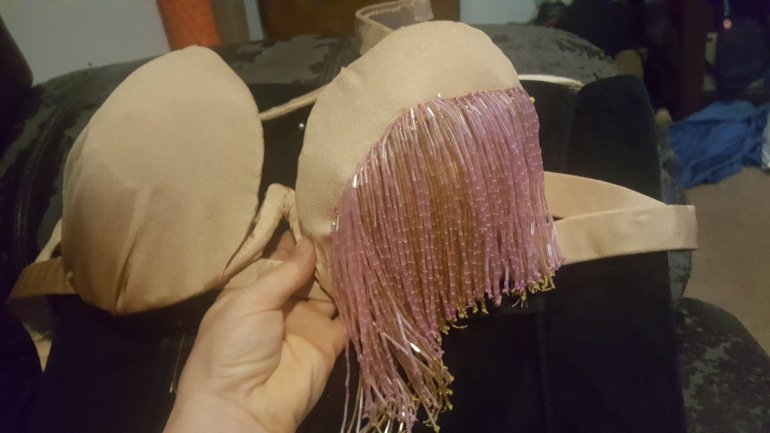
Being that I’ve been home stuck on the couch- Tuesday and Wednesday were pretty much beading straight through- Given that I haven’t left my house for two whole days I can accurately guesstimate it took 15 hours of beading to complete the one side between the two days. I completed the base layer tan on the first day and by the end of the second day- I finished the top layers of pink. I did have a substantial amount of help from the cat- so I present to you- the evolution of “sewing with the cat”:
There isn’t much more to share except more pictures of fringe, I do really enjoy sort of the visual transition from point A to point B- something very satisfying about that.
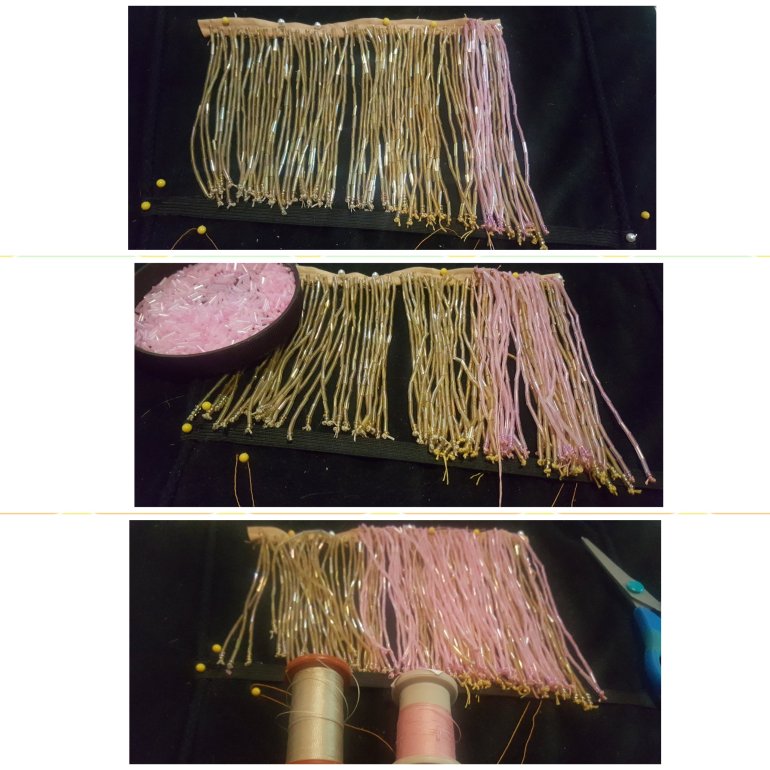
You can see at the end I was running low on that pink thread- and the color of the thread really made a difference considering how translucent the pink beads are- so what I started to do about the point of this bottom picture was do about 2 pink strands and one of the tan- if I did all tan it started to blend in with the gold a bit under neath- so I just wanted to stretch my pink thread a little bit with alternating a few out with the tan. Seemed to work reasonably well and I finished with enough pink thread to sew down some of the crystals still on the bra. And all that said- here’s the final look of the two sections of fringe:

Have to say I’m quiet pleased with the result- I need to trim up the ends and back of the second piece then get to fiddling with the bra and we can move ahead!
I got the pieces aligned and some how in all of that I noted one of these had shrunk- that or my bra cups aren’t the same size (a real possibility)- so I added a little piece to the one cup and just finished adding strands to take the whole stretch fringe from side to side completely.

Once I got the whole placement sorted out- I carefully stitched down the whole thing without puckering the face of the bra. that being done- I filled in the end bits with some more fringe right on the cup just to get the line of fringe full from edge to edge.
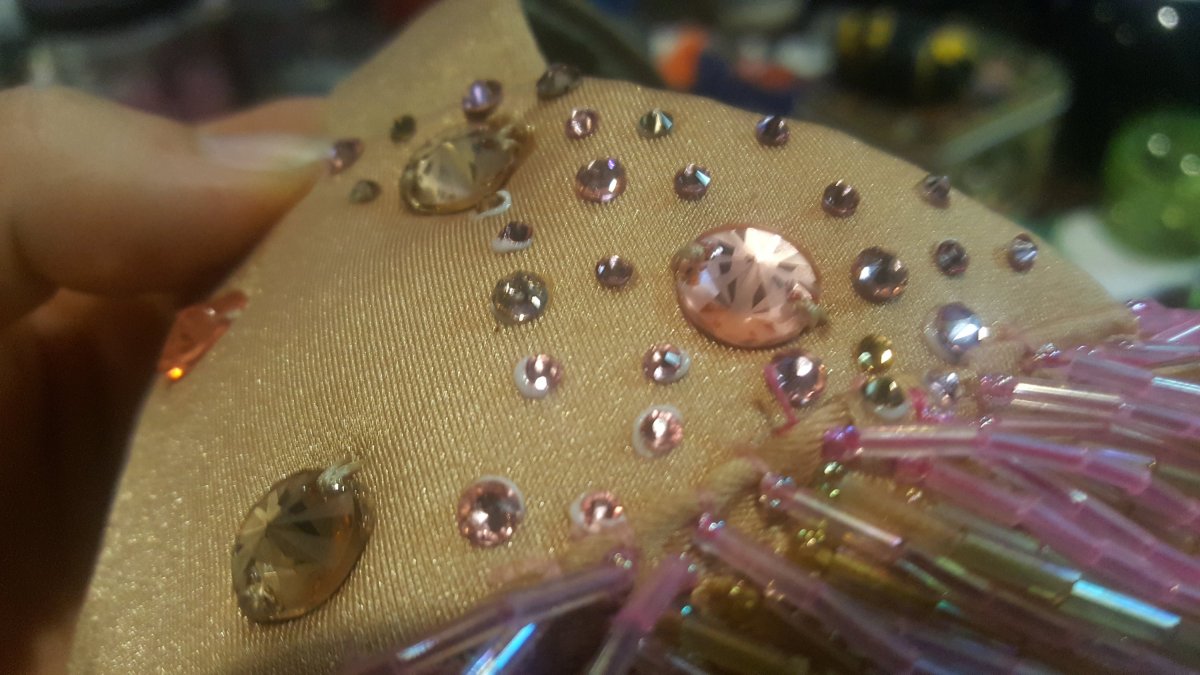
Next step was to place the larger stones on the upper portion of the bra- I used pins to set them and place them and fiddle them till I got them in a way that looked visually pleasing. I think glued them down with an abundance of E6000. Don’t do this- because then you have to fuss with excess glue when sewing down of the crystals and dried glue gets stuck on the needles. But with a pair of pliers and working quickly I managed to get them all sewn down. So just- a dab’ll do ya.
Just a side note here- with the padding and the stretch fabric- I had to be extremely careful not to pull the threads to tight because it puckered the cups badly- so it was something I had to keep an eye on. 
Once that was complete- I shook out the crystals tiny crystals into nice even piles and immediately set the bra on my knee- and let the straps fall in my neat piles of crystals and scattered them all over the table. womp. it’s not a project unless you drop shit everywhere at least once.
Tidy piles now ruined and just shoved together into one mishmash pile, I busted out the GemTac and started gluing- I semi had plan to do small ones near the larger sewn on crystals but I was mostly just worried about covering space. I will most definitely need to order more crystals- so I’m going to do that today because we are within striking distance of finishing!! I don’t want to be held up too long because I’m waiting on crystals.

As you can see I stupidly started on the right side of the cup… I’m right handed- don’t do this. OR flip the cup over so you’re now working left to right. You’re going to drag your hand through the still sticky crystals and ruin them if you don’t make adjustments.
I lost a bunch of the tiny light colored crystals in the initial *splat* of the bra straps- so I made a choice to put down the larger crystals and then futz with the smaller crystals later. I switched to E6000 for the larger glue on crystals and I’ll move back to GemTac for the tiny ones (since the E6000 is just to hard to control for those small crystals.)

Looking at the whole complete package the middle of the bra definitely needs crystals and more fringe- I think I’ll be making a V shape that I’ll put under the center piece and then do smaller crystals on the /\ section in the middle. I’ll likely need to order more for around the back to keep it more consistent looking. I am NOT convinced that edging might be needed- the bra probably will look far more finished if I edge it with the bugle beads- but I don’t know that it will be the best course of action for the belt. So I’ll get the fringe wrapped up and then place the crystals and see if it looks okay or if it needs the edging. #wingingitforlife
But there you have it- almost two full days of work took us from a blank bra to something that’s almost half way done. I accept this progress. I’m quiet pleased. If my evil plans of world domination come to fruition, I expect to get this baby wrapped up and ready to fly within a week or two- which is wonderful.
So that’s enough for this post- till next time fearless costumers!
