

8-12 November 2018
Welcome back and Happy Veterans Day- I’m grateful today for the chance to live the life I have because of sacrifices the great people of our country have made. Veterans day is hard emotionally for me for a lot of reasons, but I’m grateful to the people who have served and continue to serve.
We are going to do a quick Hulk Update- pants are moving along- but taking up a lot of time AND I’m closing in on not having any more navettes to work on the front panel (COME ON AMAZON- LET”S GO)- so this may be my last hulk post for a little while, BUT DON”T WORRY- THERE ARE MORE PROJECTS!
If you haven’t been following along- check these posts here to catch up on progress!
- Hulk Rehab: Part 1
- Hulk Rehab: Part 2
- DIY Bellydance Bra: HULK Part 3
- DIY Bellydance Belt: Hulk Part 4
- Hulk Belt Embellishment Part 5
- Hulk Rehab: Part 6
- Hulk Rehab: Part 7
- Hulk Rehab: Part 8
Last we talked- I finished off the back end panel of my belt:

And the next step is moving on the the front of the belt- I started with the center piece- as I did on the back because it made sense. I had wanted to do a circle swirl thing with the navettes and the round stone but I just realized things weren’t going that way and let the medallion guide me.
I made a design choice on the edging of the belt to gold on top- and gold on the INSIDE band- if I had chosen to do gold on the outside of both top and bottom- it would have put green on the inside and made the space seem even smaller- so I opted to force the visual space down- rather than narrowing it. That was a specific choice. Which made me challenge my choices on the round applique- I opted to start dark outside to make it come “IN”
Pro Tip- darker colors will push something back or make it seems smaller- so if you are wanting to define a space and make it LOOK smaller- use darker colors.
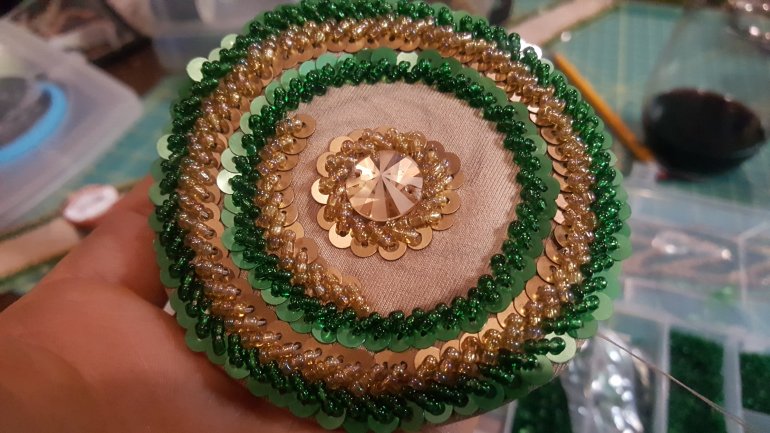
This is where we started:

And I wanted to keep some concept of “swirl” so I decided to alternate the direction of the bands. Seemed like a good move without doing crazy intertwined swirls that didn’t make sense with the rest of the belt-I did the inside round after I did the green one which proved to be a mistake because half way through beading I realized my inside gold sequins were going to be the wrong way and I would need to undo them and put them going IN to the round stone- not out.
So you know- right here is when I figured that out:
It was an easy fix- and it was easier to undo the inside section than redo four whole rows of outside beading- easy peasy.
Make sure you tie off ever couple of sets of beads- it will help in the event a strand breaks you don’t lose all your hard work! Nothing fancy really- just take the needle through the loop at the bottom as you tighten it up and repeat once or twice.

Finished! This took about 6 hours? maybe- I had some interruptions and I had to work on my pants order- so this is what I did after I had my fill of pants.
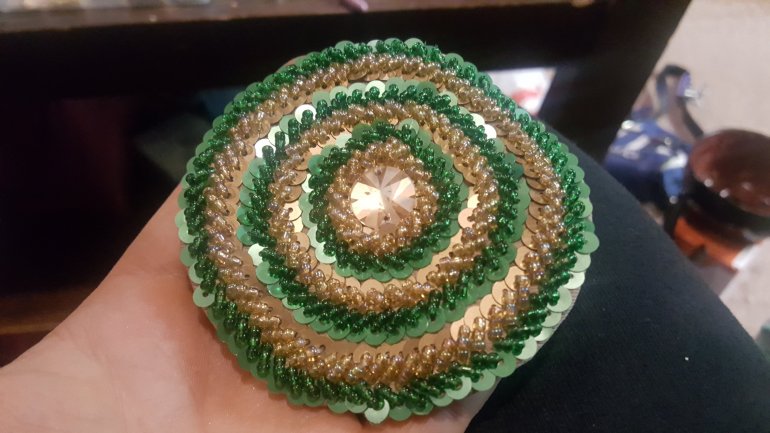
And this is pretty much the process to make an applique by the way- because that’s all this is- is a giant fat applique. So if you wanted to make smaller ones to do- this is TOTALLY how you would do it. 😉
Here’s a fun little video to watch it come together faster!
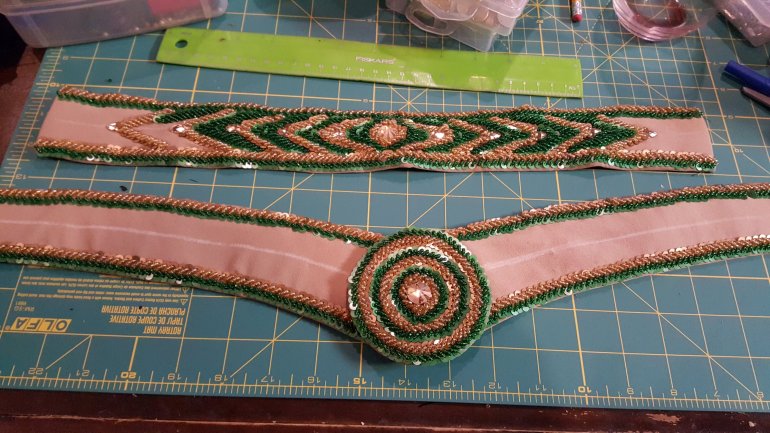
Here’s the medallion with both panels of the belts and what will be the next steps- you can see I’ve already chalked out the line for my chevrons:
And that’s what I have for you today fearless readers! Stay tuned for Thursdays post- who knows- we my go back in time!
Cheers!
Jo
